
Steps to Publishing in WCH
Publishing takes your Webflow site, rebuilds it inside WCH, and sends the finished files to the hosting you control.
How publishing works
Every project moves through three stages, and the project Dashboard shows them left to right.
- Sources: your Webflow site. This is where the content comes from.
- Rendering: WCH reads that site and builds its own copy of every page and file. The result lives at your WCH address, which is your staging copy.
- Deployment: the destinations you have set up, such as an Amazon S3 bucket, a GitHub repository, Azure Blob Storage, Aliyun OSS, or an SFTP server. This is where your live site is served from.
Nothing reaches your live site until you send it there. A publish to WCH updates the middle stage only.
Publish in Webflow first
WCH reads your published Webflow site, not the draft you are editing. Anything you have not published in Webflow is invisible to WCH, so this is always the first step.
Publishing the whole site
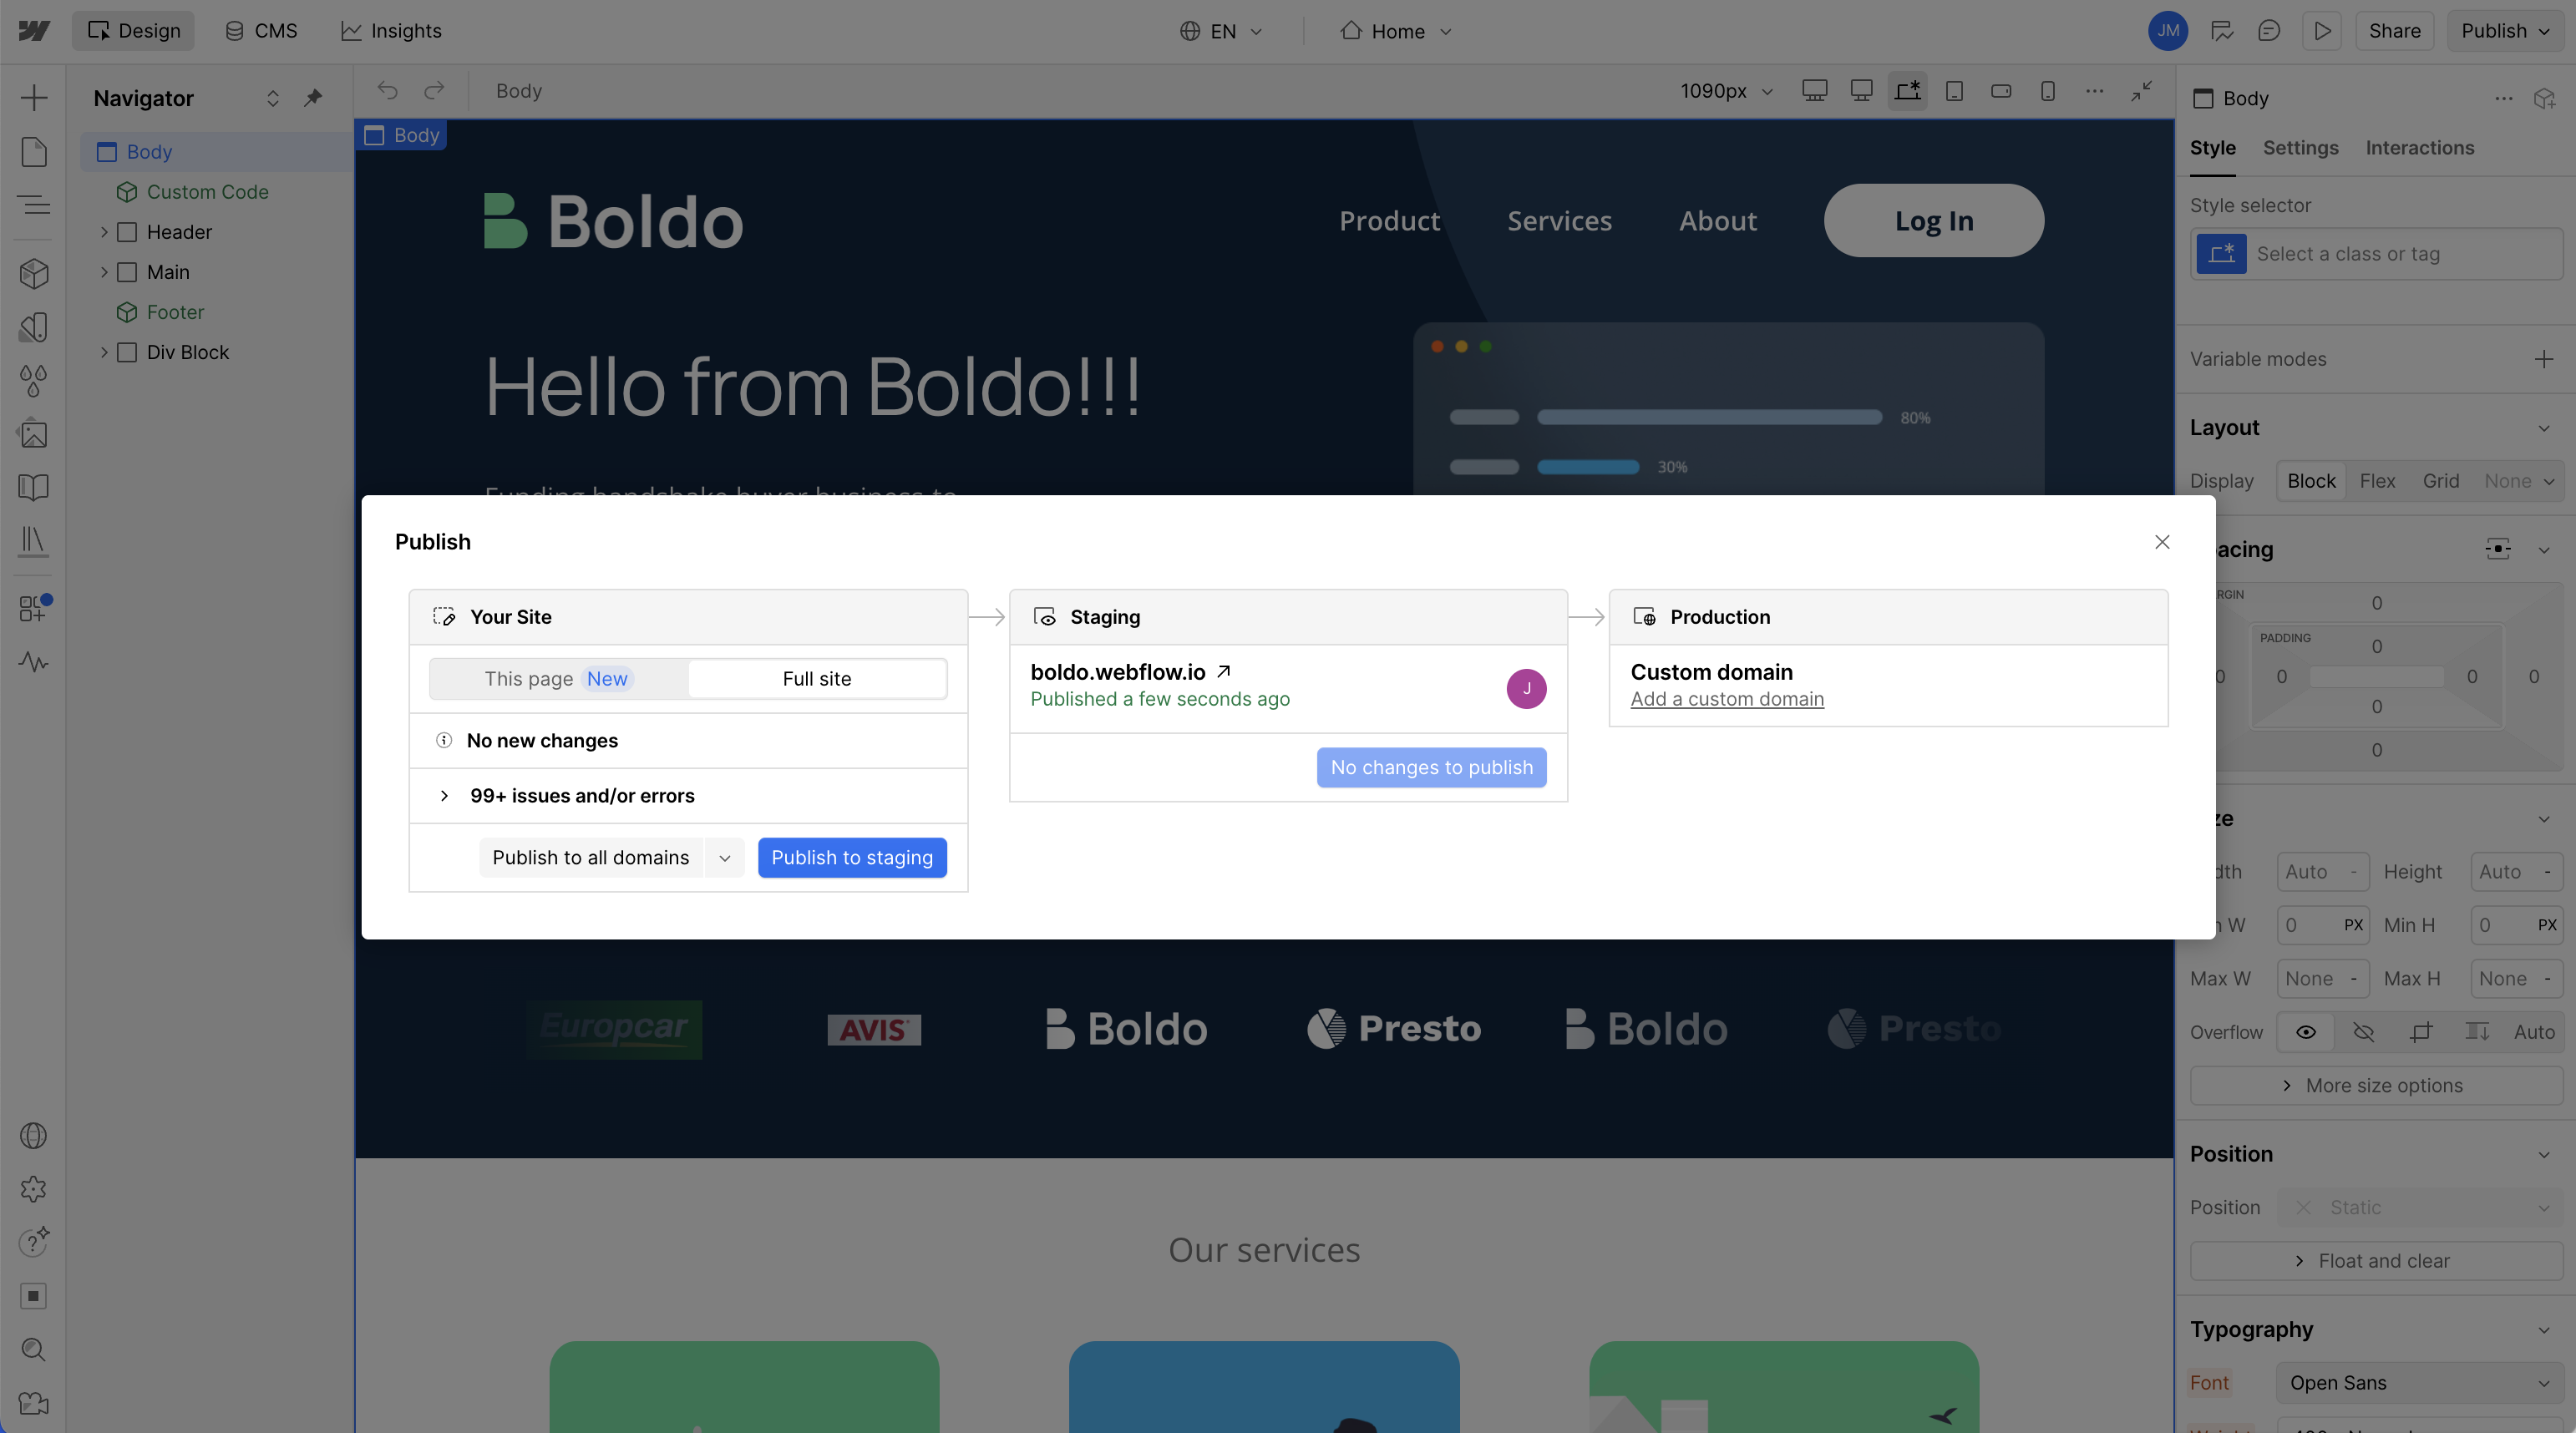
- Open your site in the Webflow Designer.
- Click Publish in the top right to open the Publish modal.
- Click Publish to staging.
- Confirm the publish and wait for Webflow to say it finished.
Publishing a single page
In Webflow, you can publish one page instead of the whole site. Open the Pages panel, select the page you changed, and publish just that page.
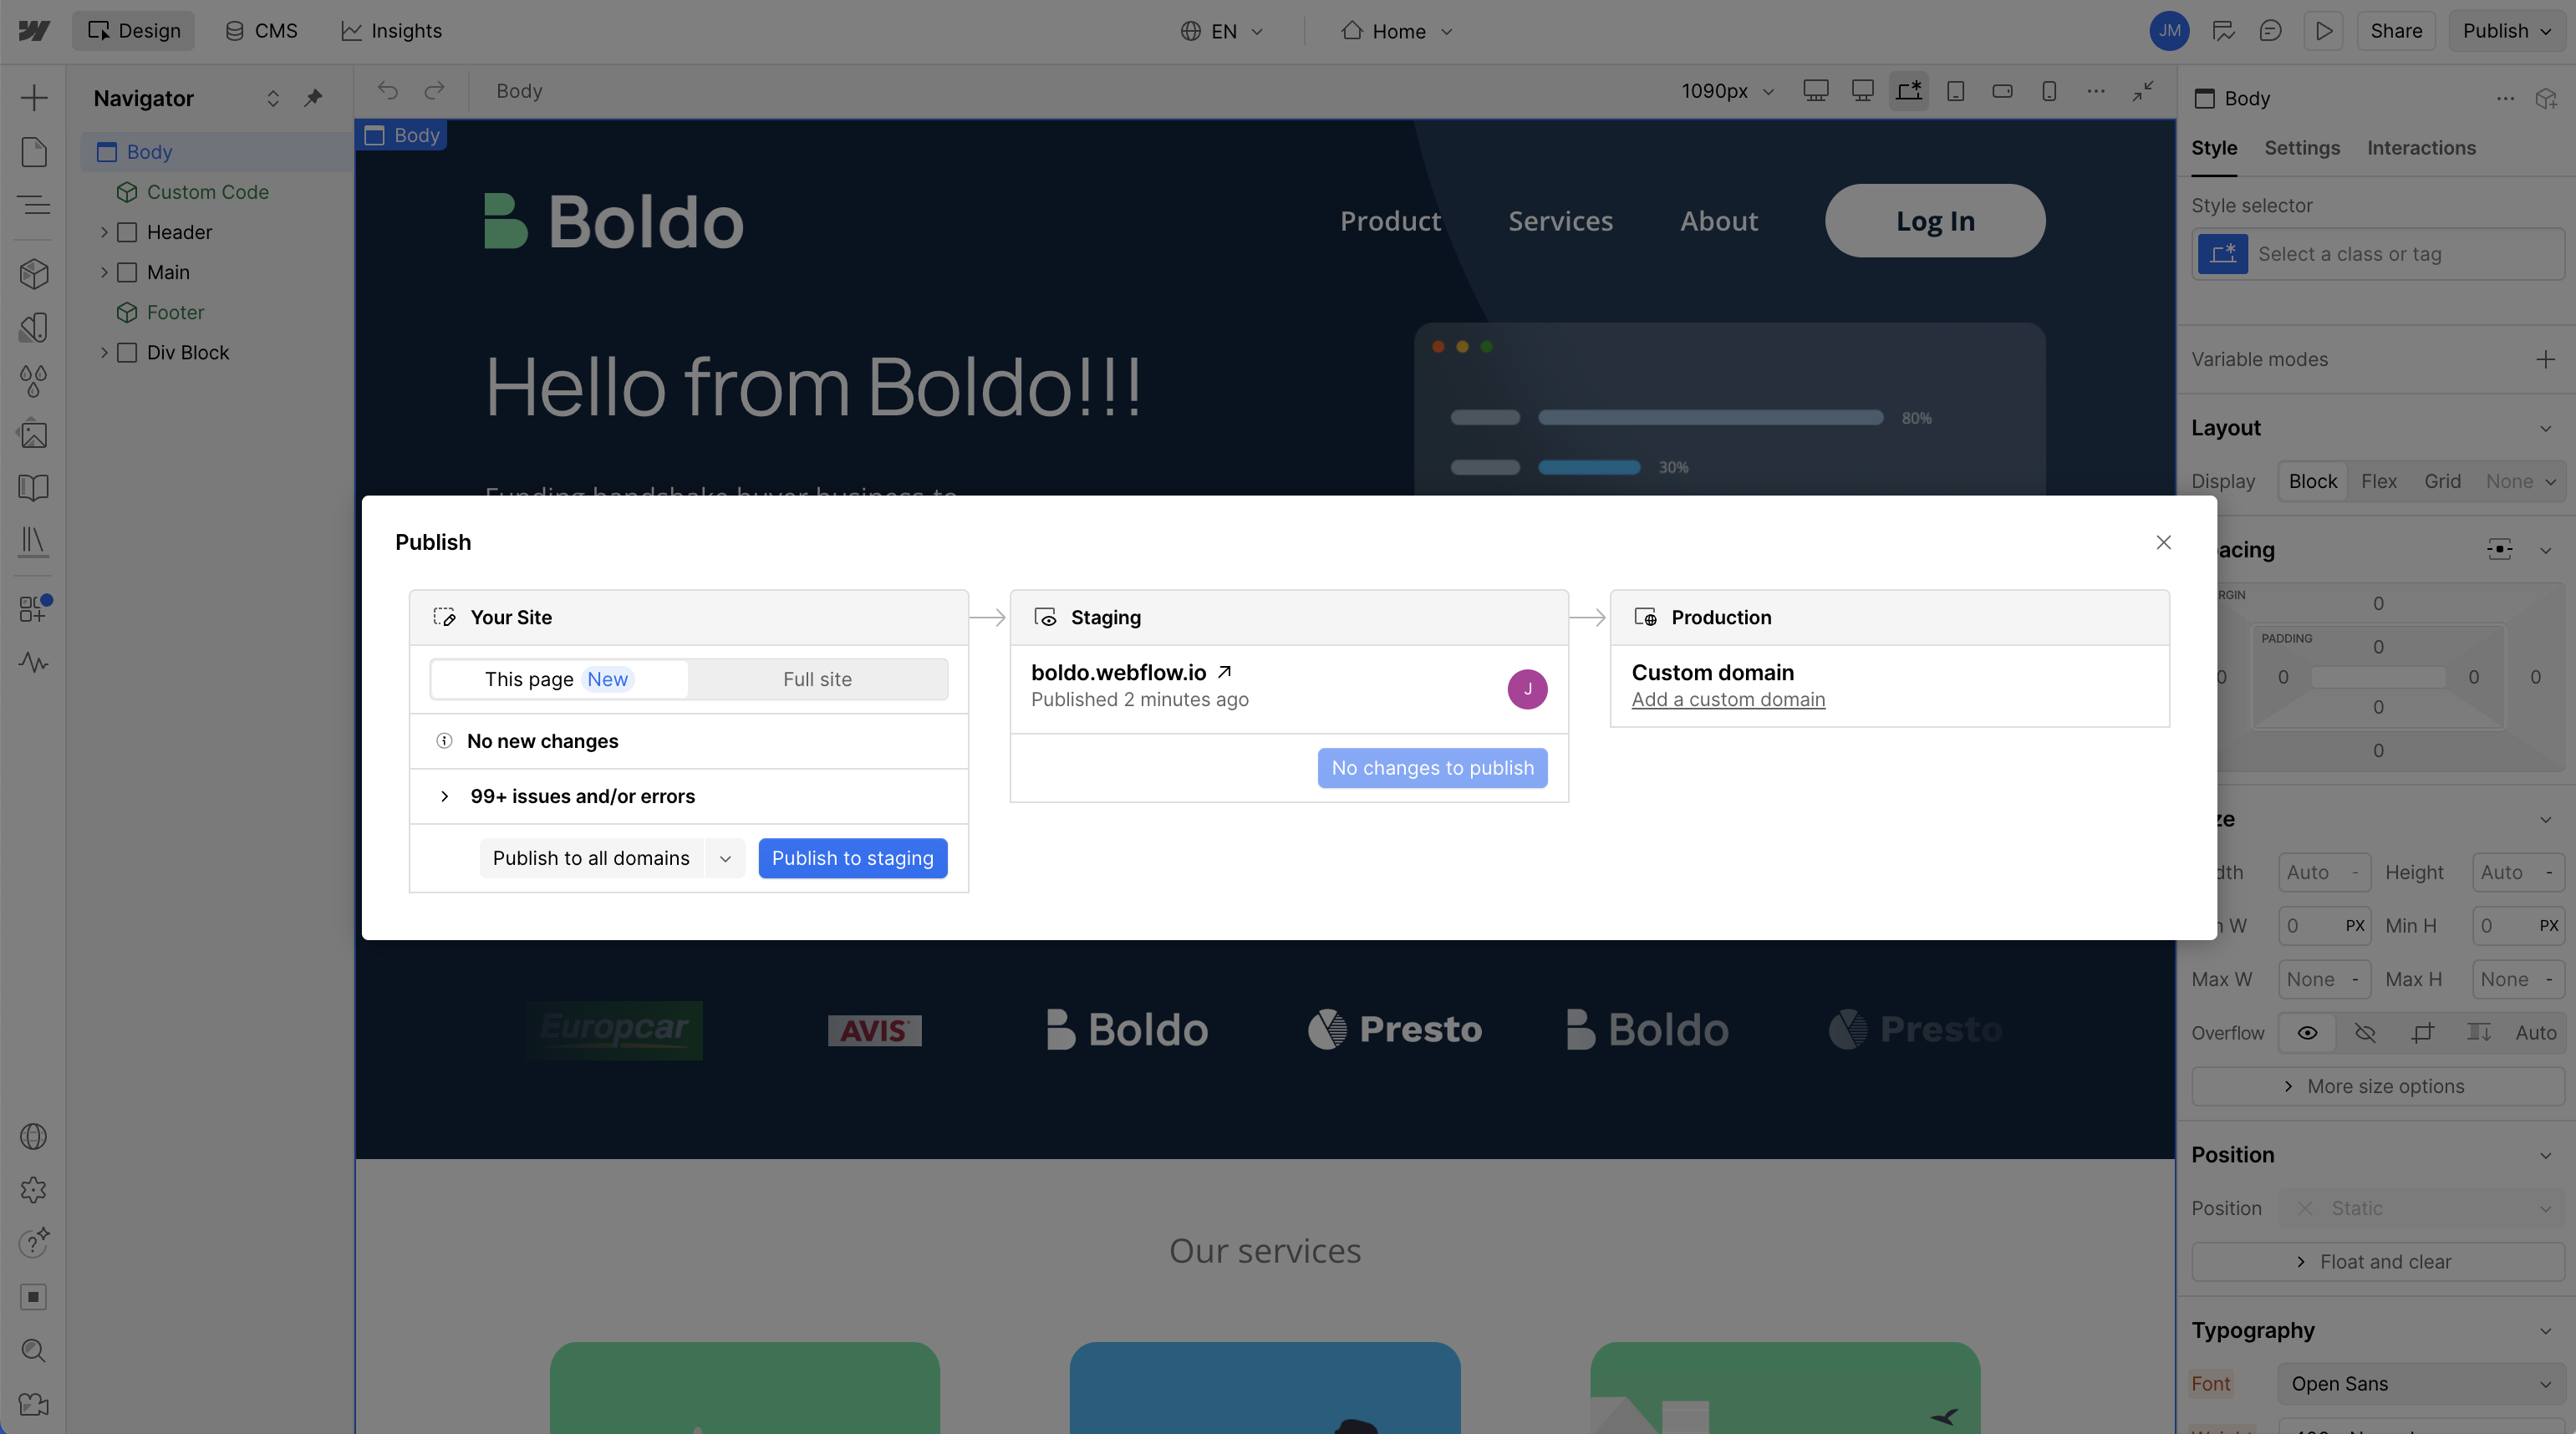
⚠️ Webflow updates the sitemap on a whole-site publish and single page publish. If you publish a new CMS item from the CMS, you also need to publish the full site to update the sitemap and make the new CMS item visible to WCH.
Publish to WCH
This is the step you will use most. It rebuilds your staging copy so you can check the site before anything goes live.
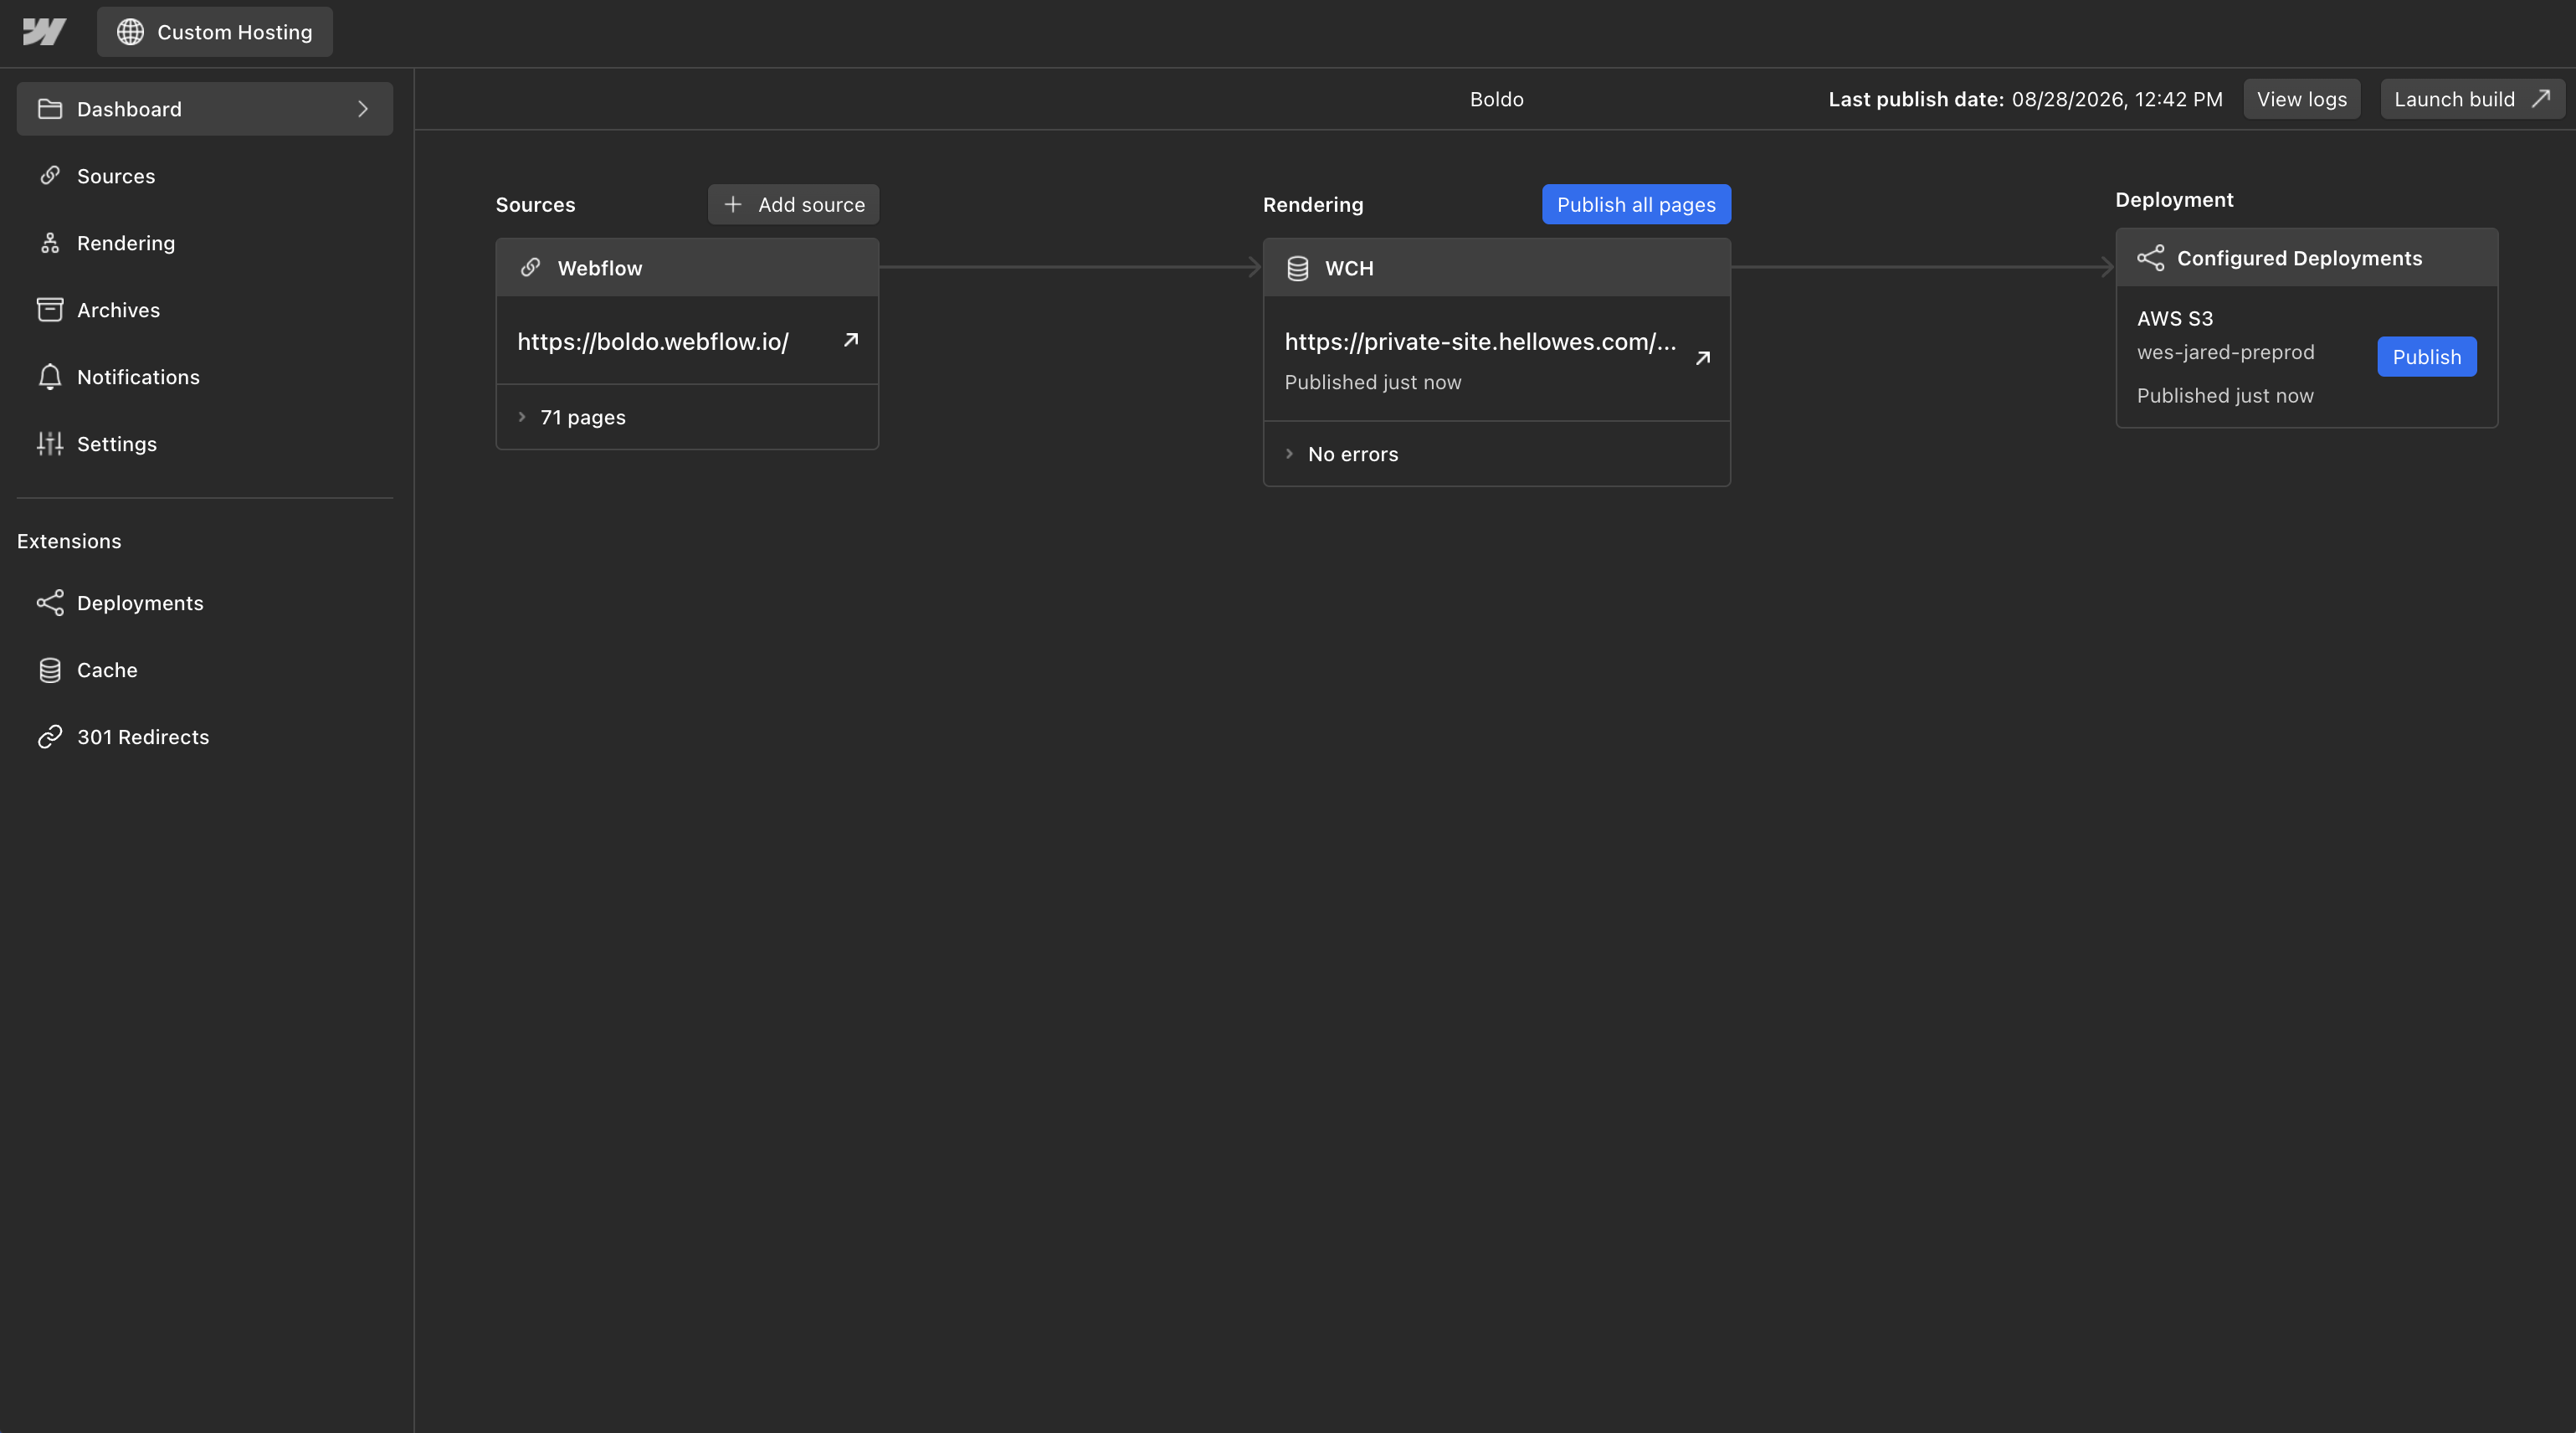
- Open the project Dashboard.
- In the Rendering column, click Publish all pages.
- Watch the progress list: Starting publish, then Processing page updates, then Finalizing publish.
- When it finishes, the WCH card shows your staging address, when it was last published, and the number of errors and warnings.
- Click Launch build at the top of the project to open the staging copy in a new tab, then check your pages.
Republishing one page
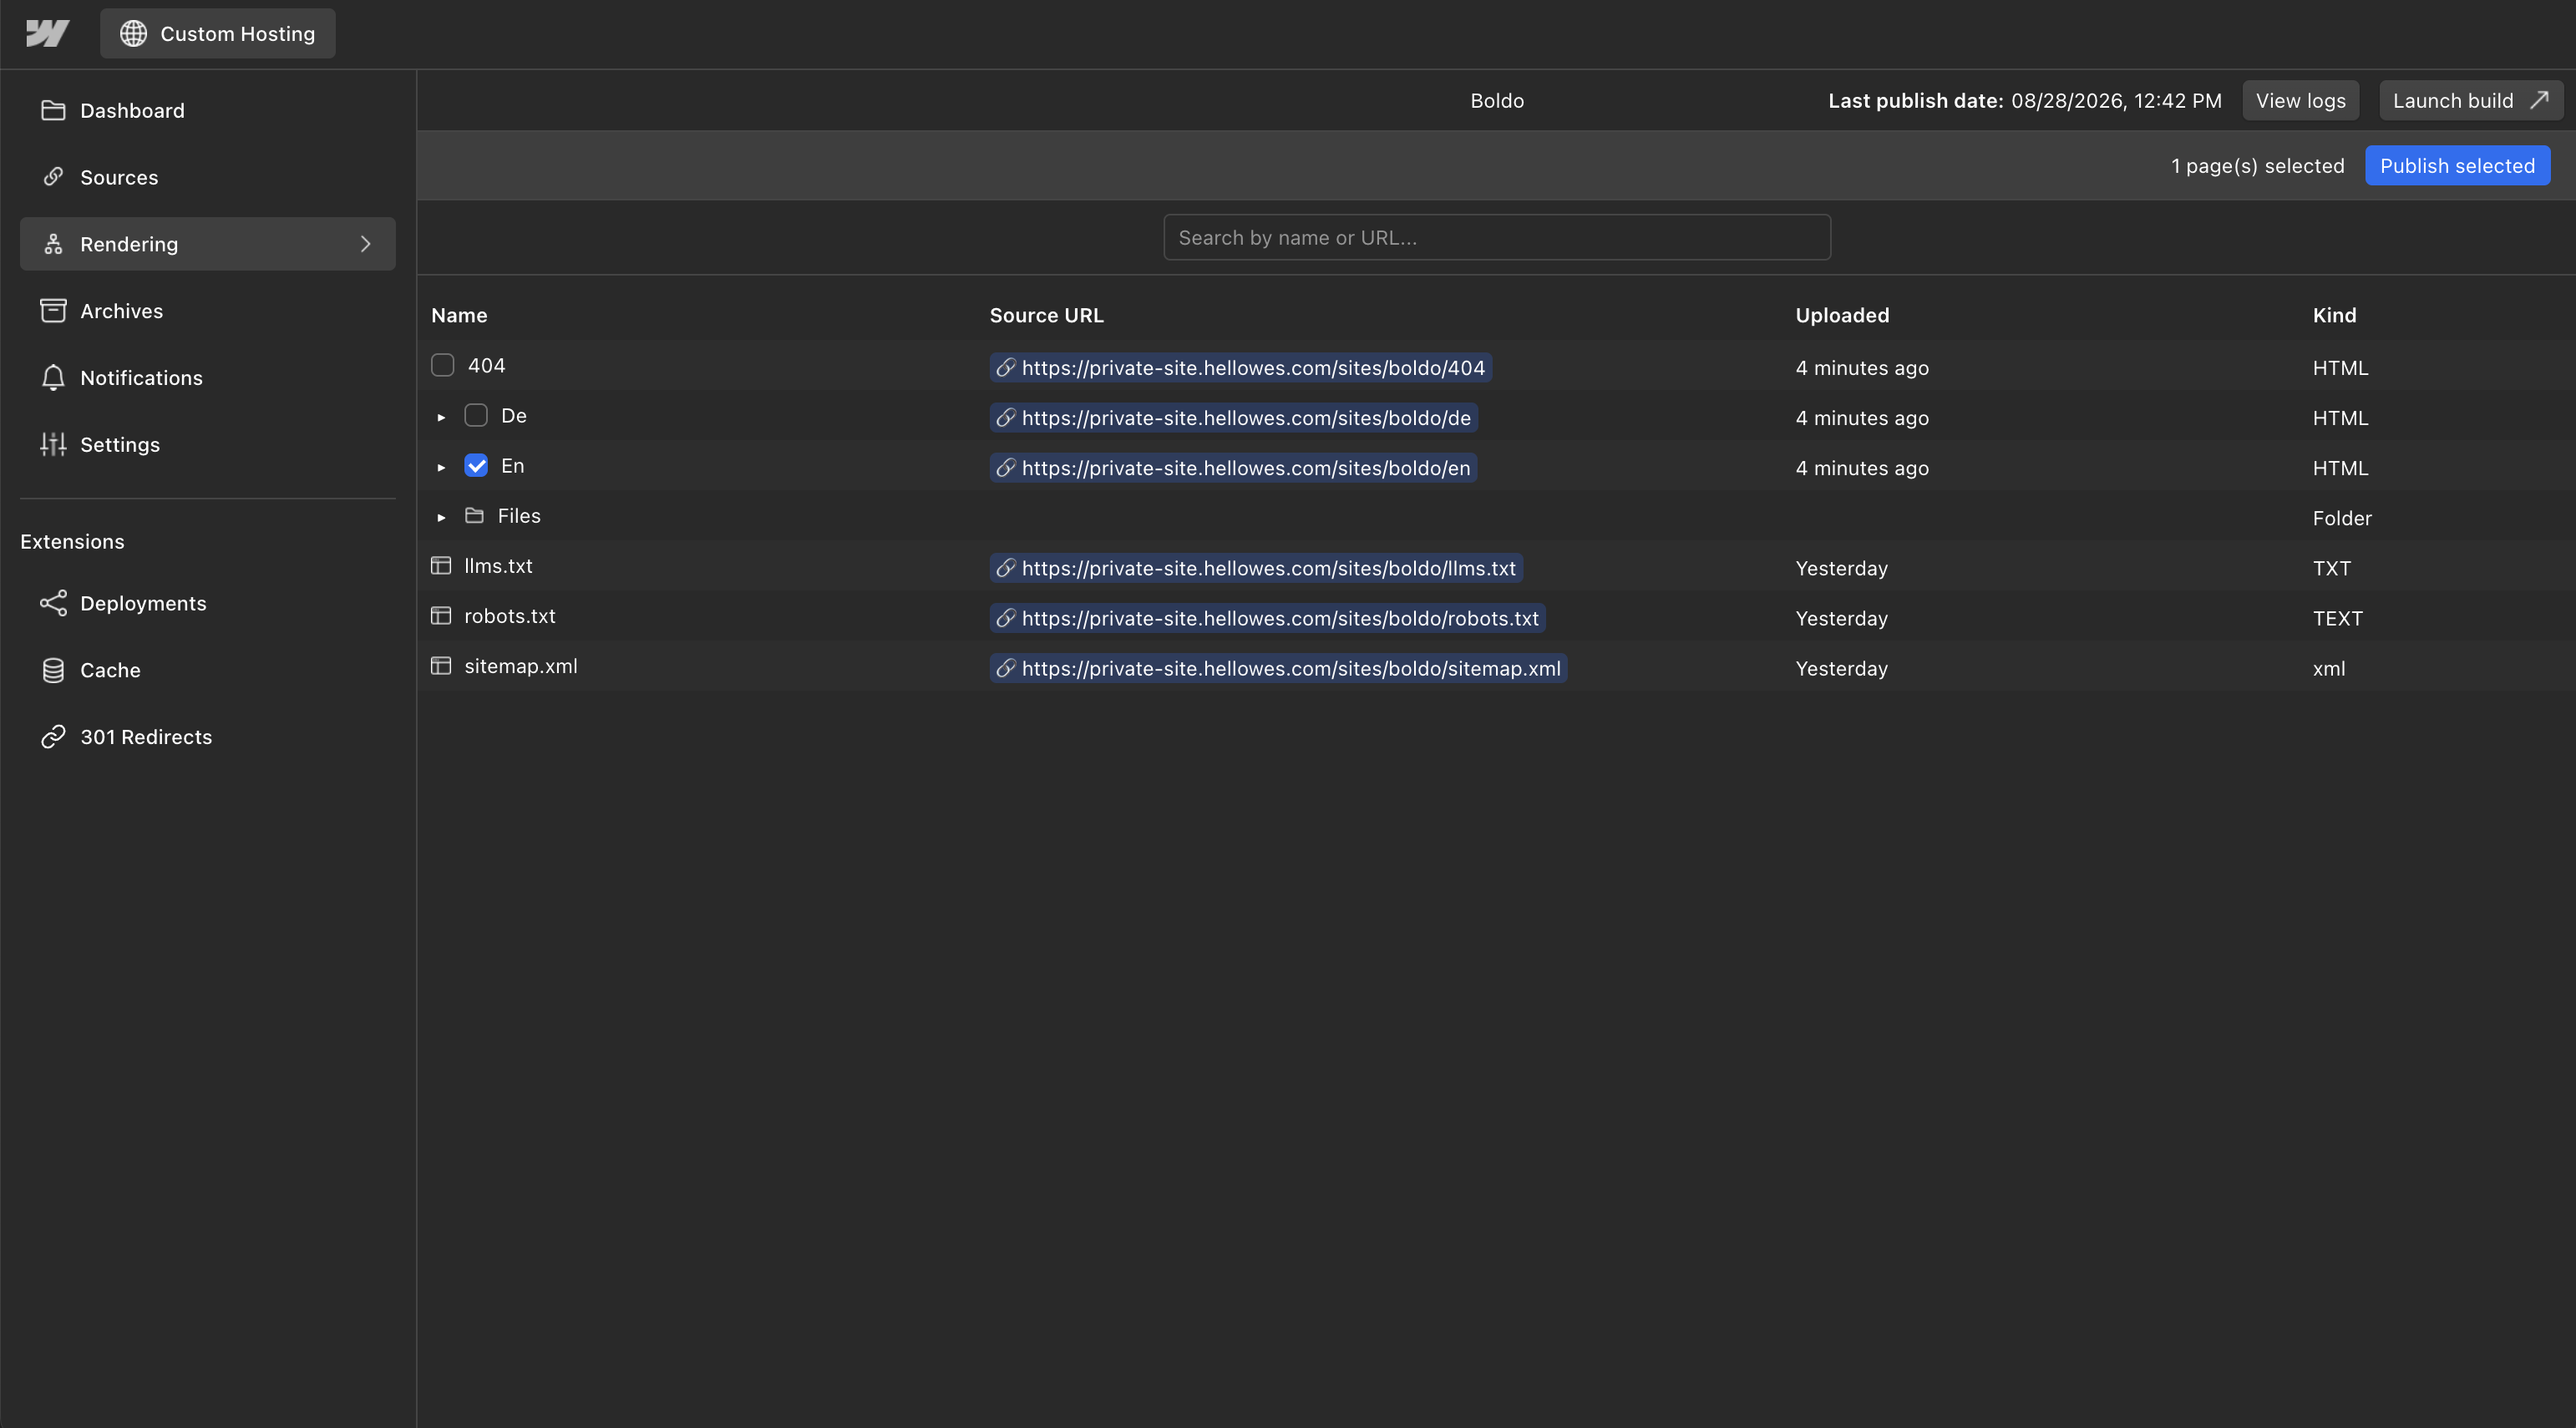
You don't need to republish your entire site. If you make a change to a single page or a subset of pages, you can publish just those pages.
- Open Rendering in the project menu.
- Find the page, using the search box if the list is long.
- Tick it and click Publish selected. To do several pages at once, tick them all first.
Send it to production
Production lives in the Deployment column on the Dashboard. Each destination is one row, with its bucket or host underneath the name and the time it was last updated.
- A normal destination has a Publish button. It builds a archive and sends that archive to that destination.
- A destination marked (Production) has a Promote button. It sends your most recent archive that you have vetted in pre-production. It does not recreate the archive.
Generating an archive
An archive is automatically generated each time you publish to a destination. You can also generate a new archive from the Archives page.
- Publish to WCH and wait for it to finish.
- Open Archives and click Create archive.
- Wait for the row to stop saying Creating.
You can also click Download on any archive to keep a copy of that build.
Publish automatically when Webflow publishes
A publishing webhook lets Webflow start the whole process for you. You click Publish in Webflow, and WCH picks it up within seconds.
Your project needs a source and at least one finished WCH publish before you can add one.
- Open Settings and find Publishing webhooks.
- Click Add publishing webhook and approve the Webflow window that opens.
- Choose a Trigger. On Staging publish runs when your Webflow publish includes a staging address, meaning any
.webflow.ioaddress or the staging domain you set in Settings. On Production publish runs only when the publish goes to your live domains and no staging address, so your Webflow site needs a production domain for it to work. - Choose a Destination. A normal destination makes WCH rebuild the site and then deploy it. A production destination makes WCH skip the rebuild and push the most recent finished build straight to your live site.
- Click Continue.
From then on, publishing in Webflow is all you need to do.
One publish at a time
A project runs one publish at a time, and a one page publish counts the same as a whole site publish. If a publish is already running, a manual publish tells you the project is currently publishing, and an automatic publish from Webflow is skipped rather than queued. Wait for the running one to finish, then publish again.
Checking what happened
The WCH card on the Dashboard shows the error and warning count from the last publish. Click the card to open Project Logs, which lists every message from the build and has a search box.
For a history of publishes, open the Notifications page. Each row records the type of publish, who started it, and how many pages and files it moved. You can filter by type, by status, and by date.